It works well, especially with fabulous images like the Bugaboo stamps, and if you'd like to see more of those cuties that are available, you can link through to the store from the Catch the Bug Blog here.
This colouring tutorial is the one that I present at the in2crafts@Hobby-X workshops, in Gauteng, South Africa, twice a year.
Watercolour pencils are expensive and to have a good range of colours, you need to mortgage your home -= well in South Africa you do!
I developed this technique which allows you to use ANY good quality coloured pencils in combination with/or without your watercolour pencils.
This is the pictorial tutorial, and the whole tutorial, explanation and some hints and tips will follow towards the end of this post.
Here goes ...


HOW TO COLOUR YOUR STAMPED IMAGES LIKE A PRO
................but be warned ………….. it can become an addiction!
You will need :
Printed digistamp : Your digistamp must preferably be laser printed but you can print on a inkjet printer, on the “fast normal” setting, and if you can, use black ink setting only. For this technique there is no need to heat set your image first.
Coloured pencils, regular or watercolour, and neon and metallic will work for this technique too - or a ombination of all
They don’t need to be watercolour pencils – I use ..
Staedtler Noris Club Pencils
Staedtler Triplus
Tricki Dicki Neons by Eberhard Faber
Tricki Dicki by Eberhard Faber
Othello Metallics by Stabilo
Rolfes Forest Colours
Bic Coloured Pencils
Pritt Kids Art Pencils
In fact any well known brand, as long as they are of a good quality and slightly ‘waxy’
OMS aka Odorless Turpentine / odorless mineral spirits (OMS)
Fine paintbrush cotton buds (Q-tips): Start off with a cotton bud and then try a paintbrush (0 or 00), or the compressed paper blenders when you are more confident
But a compressed paper pencil (traditionally used for pewter work works BEST!)
Tiny container for turps like a milk bottle cap or anything that size
Absorbent paper - A tissue or a kitchen paper towel sheet to dry your brush/cotton bud after rinsing in the turps between painting different colours
Now this is the EASY way to do it, without the flops…
1. It’s best to work on a sheet of white paper or card.
2. Using your paintbrush or a cotton bud, paint a layer of turps over a small area that you want to colour. I usually start with the skin. You will see that the turps soaks into the paper and makes it a grey colour, and goes beyond the borders of the image. This is fine because it evaporates and disappears completely once dry. (I usually use a half-capful and pour it over the image, and wipe off the excess with a tissue)
3. Now while the turps is still damp (it will stay damp enough to work on for at least 30 mins), use your flesh coloured pencil and colour in the arms, legs, face, etc. You will feel that the pencil glides on VERY smoothly. Try and colour evenly, and leave no white spaces, although these can be rectified very easily later. For darker colours you will need a “light” hand. Use a circular colouring motion as this gives you better control and will reduce the uneven colouring
4. Once you have coloured all the skin, again using the paintbrush or a cotton bud brush and turps, paint over the area that you have just coloured with the pencil. You will find that the colour seems to liquify and “smoothes” out. It will remove a lot of the colour and a paler, chalky look will remain.
5. Then go onto the next area you want to colour, and repeat the process, until your whole image is coloured.
6. At this stage you will be able to see any white, uncoloured areas show up clearly. To fix those, colour with the pencil and paint with the turps.
Now your image is coloured and if you are satisfied with the result, leave it somewhere to dry.
*Your image is dry when the damp patch all around the coloured image has disappeared. When it is dry you will see that you have a beautifully coloured image and there would be nothing wrong in leaving it that way.
*If you would prefer it to have some shading, you can go over the already coloured areas with the same colour pencil to do your shading – you need a little heavier “hand” here and must press a little harder.
*However, if you are fortunate enough to have two or three shades of the same colour in your kit of assorted pencils, you could experiment with using orange to shade yellow areas, dark green to shade lime green, and a pale brown to shade the skin areas, etc
*Once you have done the shading, use the paint brush and turps again over the whole coloured area to smooth it and blend the newly coloured areas with the previously coloured areas.
Tips
- Some colours are “stronger’ than others and you will need to have a very “light” hand for these if you want a pastel look.
- The more even your first colour goes on, the more even your final result, although the turps is a miracle worker.
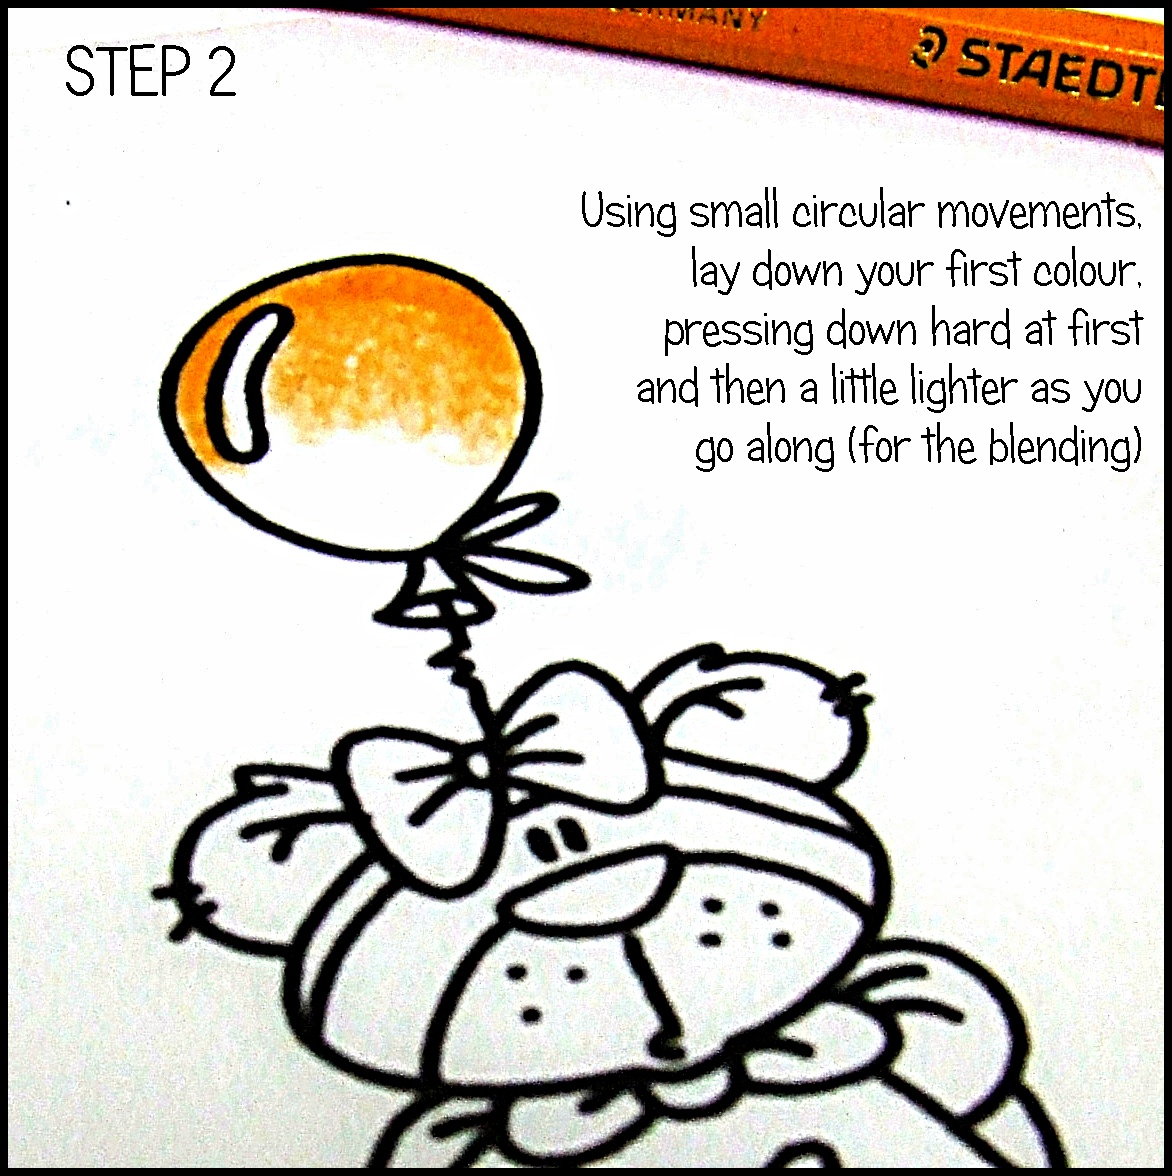
- Use small circular movements when painting over the coloured area with the turps, it seems to blend more easily.
- The bigger the contrast between your light and dark shading, the more dramatic your effect and will give your finished product the WOW factor,
There you have it – it’s flop proof and really inexpensive - you can use both watercolour pencils and regular coloured pencils for this technique. If you have a couple of sets from different manufacturers, the shades differ from pack to pack and this will help you in your shading.
And then my secret ingredient ... once your image is dry, spray it with a fine mist of clear aerosol lacquer (matt or gloss), this makes the colour pop brighter and some parts of your colouring will get a lovely professional gloss, without ruining the uncoloured card.
I hope you found this interesting. I can guarantee the results, as every one of my students has succeeded and produced a finished coloured image that wowed even themselves!
luv n huggz
Jen
October 2011/Jen Leeflang
I've attended one of the workshops and it really works with almost any pencils. I've got some Promarkers but with this method being so easy AND affordable you really dont need any of the fancy and expensive markers. Oh and the little tip at the end (spraying the image) it really makes a HUGE difference to the finished image! Great tut JEN!
ReplyDeleteGreat tutorial! I can't believe you get such vivid colors from pencils. Makes me want to dust mine off.
ReplyDeletehiya,
ReplyDeleteThank you for this link over at Papercraft Planet. i am certainly going to give this a try once I get hold of some OMS.
Thank you for sharing!
Love this. I am going old school more these days. I just need to find a compressed paper pencil that I don't need a mortgage for. LOL :)
ReplyDeleteThanks for the tut. Bookmarking it for future reference.
Thanks too for the link at PCP Bookmarked also for future reference.
ReplyDelete